
To make and approve a useful custom plush sample, agree on the artwork, finished size, materials and critical details first. Review the prototype against that brief, record revisions on numbered photos, and identify the final approved version in writing. Appearance approval alone does not confirm product safety or authorise a bulk production order.
Sample review · illustrative workflow
From artwork to a clearly identified approvalKeep the brief, review notes and final sample tied to the same version record.
-
Brief & artwork version
Identify the artwork, size, materials, colours and critical details.
-
Prototype review
Compare shape, materials and details against the agreed brief.
-
Consolidated revision list
If changes are needed, record them in one versioned list with marked references.
After revision, return to prototype review in step 02.
-
Final sample approval
When review items are resolved, identify the approved sample and version in writing.
Keep the approvals distinct. Sample appearance approval does not establish product safety or authorize bulk production.
Start with a Clear Sample Brief
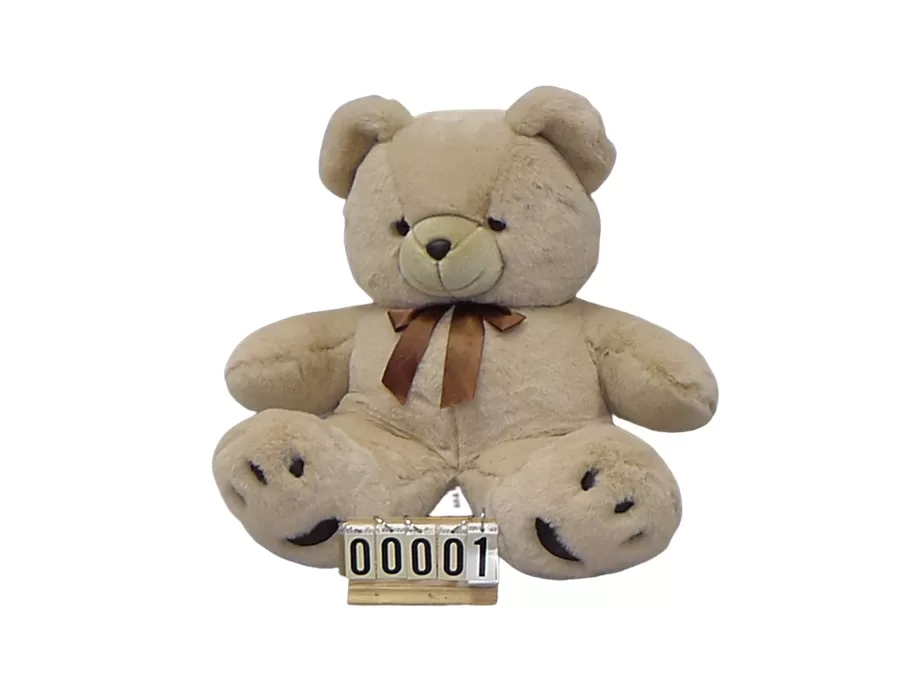
The sample stage is your opportunity to compare the physical interpretation with your drawing, identify differences and decide which changes matter before a bulk order. Keep one current specification so the artwork, sample and feedback refer to the same version.
Aokuma’s standard sample policy is USD 200 per design, up to three revision rounds, and 7–10 working days. The sample fee is refundable when an order for the same design reaches 3,000 units. Special sampling cases are individually quoted and agreed. Confirm the timing basis, refund arrangements and any freight, testing or rush charges in the quotation; these additional items are not automatically included.
Taking Your Design from Paper to Prototype

Review the drawing as a three-dimensional product: fabric panels, seams, decoration and filling must work together. The sample lets you assess that interpretation. See the materials guide when selecting the surface texture and feel.
A. How a Prototype is Created Based on Your Design and Specifications
Before sampling, confirm which artwork and specification the prototype will follow. Ask the team to identify details that may need a different construction or simplification, especially on a small plush.
The first step is to develop a pattern based on your design specifications. This pattern serves as the blueprint for your plush toy, indicating where seams will be sewn, the shape of different parts, and where various materials will be used.
The pattern is then used to cut the required pieces from the selected fabric. These parts are sewn together, filled with stuffing, and carefully finished to create your plush toy sample.
Prepare the artwork and sample brief
Provide the latest front, side and back references where available. Define the size and measurement points, colours, material feel, face and logo details, clothing, attachments and packaging. Identify the few features that carry the character’s identity. Mark missing decisions explicitly rather than assuming they will be interpreted the same way.
Only share artwork you own or are authorised to use. Distinguish your original design from images supplied only as a reference for texture or construction. Ask which sample materials are intended for bulk production and which, if any, are temporary.
B. The Materials Used in Creating a Plush Toy Prototype
Specify the outer fabric, filling and any separate components. For the fabric, define colour, pile length and surface texture; for the filling, define the firmness you want to review in the sample.
Polyester fibre filling is one possible construction choice. Specify the desired firmness and feel, and check them in a physical sample. A material name alone does not establish that the finished product is hypoallergenic, suitable for a particular age or compliant with a market’s safety requirements.
List eyes, buttons, clothing and hardware separately. Their construction and attachment need review for the design, intended age and destination market.
C. The Process of Approval and Revisions
Compare the sample against the approved brief, beginning with the overall shape and recognisable character features before smaller decoration. Record any difference with a clear view and an actionable request.
Use one consolidated revision list with marked photos, the sample version, the observed difference and the requested result. Aokuma’s standard sample policy includes up to three revision rounds. Confirm any special-case work, change in scope or additional rounds and their charges before proceeding.
After appearance approval, confirm the final specifications, quantity per variant, commercial terms, testing responsibilities and production schedule before authorising mass production. Keep the approved sample and version record as references for the later run.
A practical checklist for reviewing the first sample
Review the sample beside the same version of the artwork used to make it. Use front, side, back and close-up views taken at comparable angles. For photographs, request a neutral background and a visible measurement reference where dimensions matter.
| Review area | What to compare | What to record |
|---|---|---|
| Silhouette and posture | Head shape, body outline, sitting or standing position, and profile | A marked view showing the exact contour or angle that differs |
| Proportions | Head-to-body relationship, limb length, ear position and feature spacing | Defined measurement points and the requested target, where relevant |
| Face and expression | Eye position, eyebrow direction, mouth curve, muzzle and symmetry against the artwork | Close-up annotations; distinguish intentional asymmetry from an unwanted difference |
| Fabric and colour | Approved material reference, pile direction, texture and colour | The swatch or colour reference and whether approval is physical or photo-only |
| Embroidery and branding | Legibility, position, proportions and the approved logo version | Finished-size close-ups and any letters or lines that need adjustment |
| Feel and construction | Firmness, weight, balance, visible seams and accessible finish | Observations from handling the actual sample; photographs cannot establish every point |
| Accessories and packaging | Attachment position, clothing fit, labels, tags and fit inside the proposed package | Which exact components and packaging versions are being approved |
Agree on acceptable tolerances for the dimensions that matter to your project. A universal “plus or minus a few centimetres” statement is not a useful substitute for defining whether a measurement includes the ears or whether the toy must fit a particular box. Avoid using an unagreed tolerance as a reason to approve a discrepancy.
What should you do if the sample does not match the artwork?
Turn “the face is wrong” into a location, an observation and a requested result. Then state what must remain unchanged. The example below is an illustrative feedback format, not a report of a completed customer project.
Sample version: Character A, revision 1
Photo: Front view, annotation 03
Observation: The mouth curves upward more than in the approved drawing
Requested change: Follow the flatter mouth curve marked on the drawing; send a close-up for review
Keep unchanged: Eye spacing and nose size
Priority: Must resolve before appearance approval
Use one consolidated list per round, with one person reconciling reviewers’ comments. Separate required changes from preferences and identify superseded instructions. Confirm any additional work, changed scope, charges and schedule before proceeding.
How should you verify returned correction images?
When revised photos arrive, match them to the requested changes before sending an overall approval. Confirm the sample revision and capture date, and ask whether every view shows the same physical sample. An older front view mixed with a new side view cannot establish the current version.
Keep one row per correction: issue ID, original photo, requested result, “keep unchanged” features, revised sample ID, returned evidence, review decision, reviewer and date. Link to the actual files rather than a changing chat preview. Retain originals and save annotations as separate copies.
Use explicit decisions: awaiting evidence, further correction needed, or accepted for this feature. A supplier’s “resolved” message records reported completion; it does not record the buyer’s acceptance. If the returned view does not show the relevant detail, leave that item awaiting evidence and request the missing view. Accepted individual corrections do not constitute final sample approval.
Check the effects beyond the corrected detail
The matrix below illustrates questions to raise when a correction affects connected features. It is a review aid, not a record of an actual order or a requirement to remake every sample.
| Requested correction | Evidence to request | Connected checks to revisit |
|---|---|---|
| Reduce muzzle projection | Comparable side view; defined depth measurement if critical | Front expression, nose position and face seams |
| Shorten or reposition an ear | Front and side views; agreed ear endpoints | Overall height, silhouette and packaging fit where affected |
| Change fabric or filling | Identified material reference and physical review of relevant qualities | Shape, firmness, decoration appearance and any testing implications |
Ask which patterns, materials or instructions changed. Where a correction affects cost, timing, packaging or a testing plan, obtain the relevant review before treating the earlier decision as still applicable. Do not infer that every change requires retesting, or that none does.
What can photos and video verify?
A front photograph may show a mouth curve but cannot establish muzzle depth. Request the view that answers the specific question. Keep sample posture, camera position and viewing angle comparable; do not judge improvement from a different crop or a hand squeezing the toy into shape.
For a critical measurement, agree on endpoints, the toy’s posture and how it is handled. Request the measured value and an image showing the measurement, rather than estimating dimensions from screen pixels. A ruler placed behind the sample is not sufficient evidence of a depth measurement.
Video can show posture and movement, but it cannot replace handling the sample for fabric feel or firmness. Lighting and screens also limit colour review. List photo-only approvals and unverified qualities explicitly; request physical review where those qualities matter.
How do you identify the approved or “golden” sample?
A golden sample is the agreed retained production reference, not simply the newest prototype. Before designating it, reconcile the correction log with the actual sample. Identify accepted differences and anything excluded or awaiting a separate decision.
The approval record should name:
- Design or SKU, sample ID, revision, approver and approval date.
- Final artwork, dimensions, materials, colours and decoration references.
- Included accessories, labels and packaging versions, plus any exclusions.
- The correction-log version and evidence supporting accepted items.
- The exact next action authorised and outstanding decisions.
Record who holds each reference sample and how it is labelled. If buyer and factory retain separate pieces, identify both and confirm their agreed correspondence; matching labels alone do not establish matching construction. If the retained piece predates the last correction, resolve that mismatch before using it as the production reference.
A later alteration needs an updated revision and recorded approval, not an overwritten photo folder. Preserve the earlier record and identify which reference it replaces. Keep appearance approval separate from bulk authorisation and product-safety assessment. Agree on production inspection separately using the plush quality inspection guide.
Appearance review and product safety assessment are separate. For US-bound toys, begin with the CPSC’s official toy safety guidance, and confirm the requirements for the actual design, age group and destination market. Do not treat a factory audit or a report for another toy as proof for your finished product.
Understanding the Cost of a Custom Plush Toy Sample

A. Factors that Influence the Cost: Materials, Complexity, Design, etc.
The standard sample charge is USD 200 per design. The following details help identify whether the project needs a special sampling quotation; they do not replace the standard policy with an unspecified price range.
- Materials: identify the required fabric, filling and colour references, including any special material that needs separate sourcing.
- Construction: show unusual shapes, components or attachments that need a feasibility review.
- Design scope: list each design and sample version required instead of applying one fee to a whole collection.
- Additional items: ask the quotation to identify sample freight, testing, rush work and special-case charges explicitly.
B. How Prices May Vary Depending on Different Factors
For Aokuma’s standard policy, use USD 200 per design and up to three revision rounds as the starting point. If your project needs special sampling work, its scope and charges must be quoted and agreed individually.
The sample fee is refundable at 3,000 units of the same design. This threshold is separate from the 500-piece bulk MOQ. Combining different designs into a 3,000-piece project does not make every sample fee eligible for a refund; confirm the refund process in the quotation.
Remember to get a detailed breakdown of the costs when ordering your sample. This helps ensure that the company and you understand what you are paying for and allows you to compare costs if you are considering multiple manufacturers.
The Journey from Sample to Production

After sample review, prepare the written production handoff. The approved version, quantities, minimum order requirements, testing responsibilities and commercial terms need to be clear before the bulk run.
A. How to Move from Sample Approval to Production
Transitioning from sample approval to production involves several key steps:
- Final sample approval: identify the accepted sample version, specifications, confirmed changes and unresolved items.
- Production order: separately confirm the quantity for each design, commercial terms, testing responsibilities and schedule before authorising the run.
- Quality plan: agree on the production inspection and acceptance process. One approved sample does not prove every later unit will meet the specification.
- Shipping: confirm packing, destination, shipping scope and required arrival date separately from the sample lead time.
B. Understanding the Minimum Order Quantities

Aokuma’s bulk minimum is 500 pieces per design. List quantities separately for each size or colourway; whether variants can share a minimum must be confirmed in the written quotation. Sampling is a separate development stage; you do not need to purchase 500 samples. See the MOQ and variant guide when planning a collection.
MOQs are important to understand because they can significantly affect the unit price of each plush toy and your project’s overall budget. If you’re a smaller business or individual entrepreneur, finding a manufacturer with a lower MOQ can be advantageous, especially if you’re testing a new design or concept.
Delivery and Shipping of Your Custom Plush Toy Sample

Sample delivery and bulk delivery are separate arrangements. If you want to handle a physical prototype before approval, include its shipping and review time in the project schedule. A 7–10-working-day standard sample lead time is not a guaranteed arrival date at your office.
A. The Process of Shipping and Delivery
Shipping and delivery encompass a few key steps:
- Sample packing: confirm how the prototype and any material swatches will be protected and identified.
- Delivery method: request the available sample delivery options and charges for your destination; do not assume bulk sea-freight terms apply to a sample.
- Destination charges: clarify customs handling, duties and other charges where applicable.
- Receipt and review: allow time to inspect the physical sample and consolidate feedback before the next decision.
B. Factors That Influence the Delivery Timeline
Several factors can influence how long it takes for your plush toys to be delivered:
- Sample preparation: confirm when the quoted 7–10-working-day standard lead time starts and how special cases are handled.
- Review and revisions: allow time for your team to respond and confirm how requested revisions affect the schedule.
- Transport and clearance: obtain destination-specific estimates and clarify who handles clearance.
- Bulk production: plan it separately after the necessary sample, specification and order approvals.
Keep a Clear Record for the Next Stage

Keep the final sample version, approved specification and closed revision list together. Use those records when discussing production or a later reorder.
A. Use Project Examples Carefully

A sample review should rely on the actual design, its approved references and the observations recorded during development. Generic success stories or photographs of unrelated products do not prove that a particular character has been reproduced accurately. Any project example used for comparison should have clear provenance and permission to be shared.
The useful outcome is a clear record of what was approved, what changed and what still needs a decision. Keep hypothetical planning examples separate from real sample or production records.
B. Send a Complete Sample Brief

Send your artwork, target size and quantity per design, together with the intended age group, sales market and required arrival date. Highlight the character features that matter most and mark anything still undecided. Aokuma’s bulk minimum is 500 pieces per design. List size and colourway quantities separately; whether variants can share a minimum must be confirmed in the written quotation.
Use the custom plush inquiry checklist to organise your brief. The next step is to review the actual design and confirm the sample scope and quotation.
For the next stage, see the sample-to-bulk production handoff and the stuffed-animal manufacturing process.
